


Congratulations to Javier Sotomayor, November 2023 PFRE Photographer of the Month! The theme this month was "Open." Javier Sotomayor - Entry #879 Dave Koch - Entry #877 Peter Wingfield - Entry #874 Here's what Javier has to say: Hello First of all I wa ...


As an Amazon Associate we earn from qualifying purchases.
Whether you are shooting real estate interior photos or showcasing your products, you will want the main subject to be in focus and crisp to the viewer. However, if you don't know how to take sharp photos, your images will appear blurry, soft, and out of focus.
Quick Navigation
Knowing how to take sharp photos will help you capture professional-quality real estate pictures, whether you are shooting in low light or handheld. Even if you are capturing moving subjects or your camera and lens are not high-end, the following tips can help you capture sharp photos.

Although many people overlook the condition of the lens, dirt or grease might be the cause of image blurring. For instance, dirt and dust can accumulate faster than you expect if you're shooting in dusty conditions. Fortunately, you can remove the dirt and dust using a soft bristle brush or a blower.

Then use a soft cleaning cloth and a few drops of lens cleaning solution to wipe the lens, working from the center outwards. However, if the image blurring results from condensation, you can give the camera lens some time for the moisture to dissipate naturally.
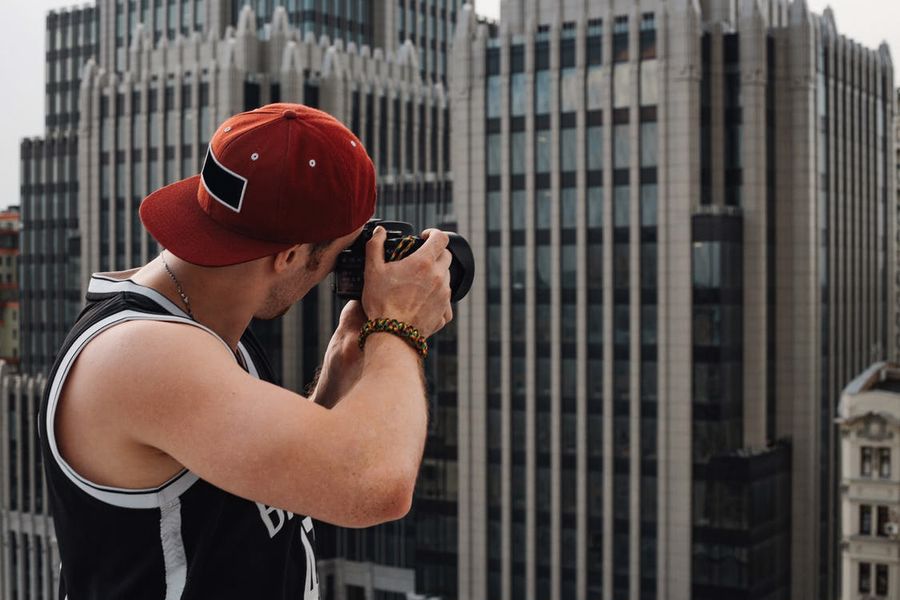
Prime lenses have fixed focal lengths, and the fast ones have a large maximum aperture of up to f/1.2. Since prime lenses are designed to function at a fixed focal length, they have a better optical quality than zoom lenses at the same focal length and aperture.
Typically, fast prime lenses can achieve a better shallow depth of field and produce a beautiful bokeh quality. This effect makes the main subject appear more focused, sharp, and appealing. However, without the zoom capability, it means you'll need to go closer to the subject to shoot a sharp image.
Even if you are capturing a stationary subject and your camera or lens comes with an image stabilization system, there are chances of capturing a blurry image if you fail to steady the camera. Depending on the
Whether shooting at low light or capturing a moving subject, a camera tripod is an ultimate way to steady a camera. When using a tripod, you should consider the overall weight of your camera plus lens and the maximum load capacity of the tripod.
Usually, a sturdy and heavy tripod can support the camera better without wobbling. If you're shooting in strong winds, you can hang some extra weight on the tripod or hook it to a firm object to add extra stability.
Unless necessary, you should not extend the center leg of the tripod as it can reduce stability. Instead, spread the tripod legs to improve its overall stability.
Whether you don't own a camera tripod or you find it cumbersome to carry it around when shooting real estate photos, you can still steady the camera when shooting handheld by leaning on a firm object.
Hold the camera with both hands, tuck your arms into the body and then hold it close to the torso. If possible, you can also rest your elbows on a firm object to minimize shaking. If you are using longer exposures, you can avoid a camera shake by taking a deep breath before starting the shot.

If you don't have a tripod, you can still steady the camera by placing it on the ground and then controlling it remotely. Typically, a camera on the ground will be safer and steadier than the one on a tripod. However, unlike tripods, you might not enjoy the flexibility in points of view.
Most modern cameras and high-end lenses come with an inbuilt image stabilization mechanism that helps reduce the camera shake when shooting handheld. Although the name of this mechanism might vary, it’s a function that allows you to take sharp photos using slower shutter speeds of up to five times.
Although this function can help reduce camera shake when shooting handheld, turning it on when using a tripod can introduce image blurring. Mainly, it is because the image stabilization mechanism is designed to minimize the camera shake, which is absent when using a tripod.
The lack of shakes causes the system to search for movements, introducing tremors. Therefore, it is advisable to turn off the vibration reduction mechanism if you're using a tripod to take your pictures.
The main cause of image blur is a lack of precise focusing. Focusing involves adjusting the camera lens to expose maximum sharpness and finer details in the main subject. That means an image blur due to subject movement or a camera shake effect is not similar to a blur that results from improper focusing.
If the background and the surrounding of your main subject look sharp, but the main subject doesn't look sharp, then it is a focusing problem. Although most modern cameras come with an autofocus system, their performance primarily depends on how advanced they are.
If you are using a low-end camera or your autofocus isn't precise due to low light, switch to manual focus mode. Twist the lens as you check through the viewfinder to see whether the subject is in focus. You might need to focus several times while reviewing the images on the camera screen.
A camera shutter speed refers to the speed at which the camera shutter closes. That means the shutter speed determines the duration of the camera's sensor exposure to light. Typically, a slow shutter speed means a longer exposure, and a high shutter speed means a shorter exposure.
Longer shutter speed increases the chances of your camera setup shaking or subject moving before the shutter closes. As a result, the camera produces a motion blur effect. You can avoid this motion blur effect and capture sharp images by using fast shutter speeds.
Keeping in mind that the shutter speed determines how much light the camera can take in, fast shutter speeds means darker images, especially in low-light conditions. For the optimum balance between brightness and sharpness, it is advisable to use a shutter speed of 1/focal length x 1.5.
Shooting in burst mode is a tactic that can help you improve the odds of shooting sharp photos when shooting without a tripod. It involves shooting many pictures continuously, choosing the sharp ones, and deleting the rest.
This technique can help you capture sharp images of a moving subject without motion blur. The burst mode in modern cameras can allow you to fire up to five shots per second. However, this mode will require adequate storage space, especially if you are shooting the photos in RAW format.
ISO refers to how much the camera sensor is sensitive to light. That means a higher ISO will make the camera sensor more sensitive to light, and the image will brighten. That means higher ISO settings can help you take pictures even in low light conditions.

Considering that high ISO means more amplification of the light signal by the camera sensor, it can lead to digital noise that can negatively impact the image's sharpness. This digital noise can be visible in an image in the form of color and light speckles.
Unless you are shooting in low-light conditions, keeping the ISO as low as possible is advisable to eliminate this digital noise. If you are unfamiliar with ISO settings, you can set it to auto mode to allow the camera to automatically adjust depending on the lighting conditions.
The aperture is the diaphragm opening in a camera lens that allows light to enter the camera. This opening varies with the lenses, and the wider it is, the more the light can enter into the camera. Fortunately, the aperture is adjustable in most lenses.
Usually, a wide aperture leads to a shallow depth of field, blurring the background and objects in the front of the subject in focus. That means a wide aperture will make only the portion in focus sharp, and the rest of the photo will be blurry.
Therefore, it is advisable to narrow the aperture if you want a large part of the photo or the entire scene to be in focus and sharp. In most cases, this aperture will be around f/7.1 to f/13. However, you might need to use a wider aperture when shooting in low-light conditions.
A remote shutter release is a gadget that you can use to remotely tell your camera to capture a photo without pressing the shutter button. If you are shooting your photos handheld, a remote shutter release can help you avoid the camera shake when pressing the shutter button.
The remote shutter release also allows you to focus on a subject, position your camera on an object or ground and then remotely trigger the camera, allowing you to capture sharp photos.
However, there are many types of remote shutter releases, and you need to ensure the type you choose is compatible with your camera. For instance, some wireless remote shutter releases use an infra-red connection which some camera models do not support.
The RAW file format is some form of a digital negative that contains lossless and unprocessed image data directly from the camera sensor. It means you will have the raw ingredients for processing a picture. You can then process this data into a digital image using a photo editing software.
Although this technique doesn't help you outrightly capture a sharp image, like shooting the photos in a burst mode, shooting in the RAW format allows you to improve your results afterward.
Remember that the RAW files are larger than processed and compressed image files, so ensure you have sufficient space in your memory card. You will also need to access an application such as Lightroom, Capture One, or Photoshop to edit and process the images to improve their sharpness.
Usually, improving the lighting conditions is the ultimate way to shoot sharp photos without struggling with the camera settings. Typically, good lighting will allow you to shoot at low ISO, high shutter speed, and with a narrower aperture.
Although sufficient ambient lighting will help produce the best results, it may be insufficient if you're shooting real estate interior photos. You can use the following tips to improve your results in different lighting conditions:

Enabling the Camera live view allows you to see the subject the way the camera lens is seeing. Instead of looking at the subject through the optical viewfinder, you will be looking at it from an enlarged image on the camera LCD screen.
This way, you'll be able to compose the shot from what you see on the LCD screen. Depending on the camera brand, you can activate the live view using an LV button or a switch.
If you are a novice, the live view allows you to experiment with different camera settings and focusing techniques until you achieve the sharpness you desire before shooting. However, a live view can drain your battery faster.
Shutter shock is an image blurring that occurs due to a camera shake when you press the shutter button. Typically, this vibration occurs in the camera body as the shutter mechanism opens to begin exposure. This blurring is more noticeable when using high-resolution cameras.
Sometimes the effect can be extreme, and the subject outline might seem duplicated. Fortunately, most modern cameras come with an inbuilt electronic front-curtain shutter (EFCS) feature that can help eliminate shutter shock. However, the procedure of activating EFCS varies with camera models.
The electronic front-curtain shutter works by opening the shutter and exposing the camera sensor before the actual shot occurs. That means you will not be triggering the mechanical shutter when you press the shutter button. The mechanical shutter will then close after the exposure.
If you're using a high-end camera or are unfamiliar with manual focus settings, you can still capture sharp photos using the camera autofocus mechanism. However, for the best results, you need to understand the different autofocus settings such as:
The camera will also indicate the different focus points in the viewfinder. You can leave this option for the camera to automatically select or manually choose one of the following focus modes:
When you press the shutter button to capture a photo with a digital SLR camera, the mirror flips up to allow light to get into the camera sensor. If you're shooting the photos using a long telephoto lens, the mirror flip might cause tremors resulting in image blurring like that of the camera shake effect.
When you enable the mirror lock-up mode, the camera will flip the mirror when you press the shutter button for the first time and then capture the photo when you press the shutter button for the second time.
However, using the mirror lock-up mode means you won't see through the camera viewfinder because the mirror is locked. Also, not all camera models come with this feature, and the procedure of enabling it differs with brands.
Camera lens filters help protect your lens from damage, improve colors, reduce reflections and regulate how much light enters your lens. However, the quality and the types of lens filter you are using can impact how sharp the lens can capture a photo.
Typically, there are high chances of light getting degraded, altered, or bent as it passes through the different elements of a lens filter. As a result, there might be color casts and artifacts formations, leading to image blur.
Unless you're shooting in harsh conditions such as moist or dusty situations, it is advisable to avoid using protective filters such as UV filters. You should also avoid stacking filters as they only amplify their effect on the image sharpness.
Shooting tethered means using a third-party photo editing application such as Capture One to view and compose your shot. It can be of great help if you're unfamiliar with the different settings of the camera model you are using.
The application provides you with a live view and displays the camera settings in an easy-to-use manner. Typically, this gives you room to play around with different settings until you achieve the sharpness you desire.
Weather conditions can affect the sharpness of your photo, especially when using long lenses to zoom in and capture distant subjects. Considering you are not shooting in a vacuum, the air quality between the camera and the subject can affect image sharpness.
For instance, capturing distant subjects in foggy conditions can blur the photo. In such cases, it is advisable to move closer to the subject to capture a sharper shot rather than zooming. Keep an eye on the lens to ensure no accumulation of elements such as moisture.
Optical zoom doesn't affect the sharpness of a picture as it only enlarges the photo while retaining the resolution and number of pixels in the picture. Typically, it is because optical zoom doesn't magnify the picture. Instead, it brings the subject closer through mechanical changes in focal length.
It is impossible to remove image blur after shooting, compressing, and processing the photo. Although you can use photo editing software to make the blur look like an image effect, it will be noticeable if it resulted from the subject being out of focus. However, a RAW file is editable.
Yes, resizing can affect the image's sharpness, making it blurry when you enlarge it. Considering that resolution is the number of pixels per inch, enlarging an image makes the pixels correspondingly far apart, causing blur.
Learning how to take sharp photos will help you capture crisp real estate pictures regardless of your camera or lens. Ensure your lenses are clean, steady the camera and shoot with faster shutter speeds at low ISO. If you want to improve the sharpness later, shoot in RAW format.


